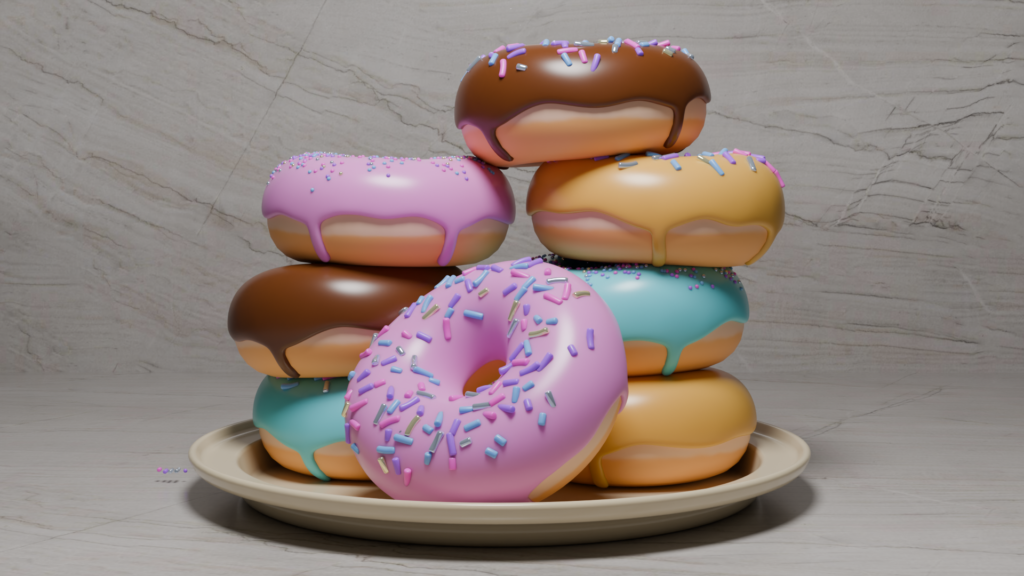
In this session, I made the plate that would support my donuts. Then, to make a stack of donuts, I duplicated them a number of times and rotated them so they wouldn’t look the same. I also leaned some at slightly different angles to make the stack look more natural.
For the plate, I made a simple circle and used the “vertices select mode” to rise the edges up. After jutting out more faces from the risen vertices (to give the plate a risen edge), I bevelled the edges and applied a solidify modifier to give the plate thickness. I rounded the edge of the plate (held C while bevelling edges so as to give it the perfect rounding) and gave the plate a shine and a touch of colour to make it look more realistic.

Following this, I made my stack of donuts. Blender Guru made sure to tell us to face one forward so it was easy to tell they were donuts, since the camera for the rendering will be showcasing the donuts from the side. Here are how they turned out!

After this, I wanted to vary the types of donuts since they were all the same colour. I swapped the types of sprinkles on each donut in the modifier tab and changed the colour of the donuts in the material tab. I moved the light source to the front and got a picture of where I’m at so far in the tutorial, and I am extremely happy with how it’s looking thus far!
Below is the video I used for the tutorial at this leg in the journey. Once again, credit goes to Blender Guru for his amazing work and I am very excited to look at the next final steps in his playlist!