For this session, I followed two tutorial videos instead of one. Working off of my last update, this session was all about the environment, ambience, and general lighting and composition. To start, I got rid of the bright light source from my last update and replaced it with one that mimicked the lighting form the sun in real life. Blender has a feature called “World Properties” where you can add in a sky texture and a sun. From there, you can modify the sun’s position in the sky, size, rotation, and intensity. It’s default settings are accurate to the real world (including it’s size relative to Earth) and you can play around with it to fit your desired effect.

Problem was, even with the intensity turned down, the scene still felt very bright and didn’t match the lighting one would see in a real world kitchen. To remedy this, I added a cube mesh to surround my scene and carved a window into it. I did this by hitting I on the leftmost face of my cube to select the middle of the plane and hitting X to remove the middle of it. I then used vertices select and G to move the edges around to where I wanted them. I also had to make the rightmost plane completely black to avoid the light from the “sun” bouncing off of it onto my scene. After this, I added an area lamp (with low intensity and a yellow tinge) to gently hit the dark side of my donuts because in most houses there are usually other lights that affect a scene from afar, and this replicates that without being so harsh.
I also learned how to import add-ons to Blender. Blender Guru’s website, Poliigon, has an add-on that allows for the quick and easy importing of models and textures right into your Blender scene without having to go to the website in a web browser. This saves the hassle of downloading, unzipping, finding what you need when importing, etc. By hitting N, I can open a tab with a quick search feature that shows me what I can put into my scene. Using this, I imported a couple of decorations into my “kitchen” scene: A set of wooden utensils and a succulent. I also changed the backsplash from quartz to a brick texture that I liked because I felt like it made the scene a little less bland and a bit more homey. Below, I’ve included a link to the video that went over all of this!
The next video taught me about the compositing tab! This tab allows for more precise modifying of how light interacts with the materials in a scene. In this case, I used it to add a bit of lighting bloom and glare in my render. To do this I used more NODES. I’ve learned that you use nodes A LOT in Blender but they have so many uses and can do so much for your scene I can’t imagine not having them. There were multiple steps to the process of adding glare, and I’ve left a screenshot of the required node setup below.

I then went to my render options and played around in the colour management tab. This allowed me to modify the overall lighting of my scene, which I made a bit more saturated to give it a warmer tone. Following this, I also added a bit of lens distortion to my render camera to mimic a real-life camera. While it’s a subtle difference, it’s one of many small features that add to the overall sense of realism. The lens distortion was done with the nodes in the compositing tab again. I’ve included my final node setup below along with how the render looked before and after the addition of the nodes! All of these small changes combined to make quite the improvement!


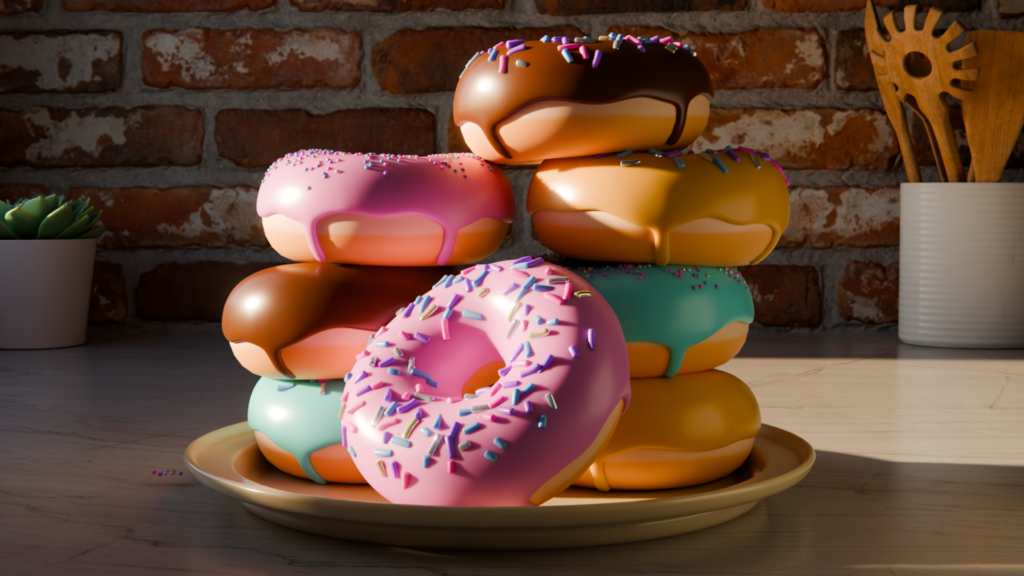
And with that, I’m done for today! I only have a few more videos left in this comprehensive Blender tutorial and I plan to finish my Inquiry with the final video. I will make a video at that point to showcase my final result and demonstrate my learning! It has been incredibly fun and I’m so glad I chose to learn Blender through this playlist! Below is my final render of the day and the second video I used for this post.